Denon DCM-390/290 User Manual Page 10
- Page / 16
- Table of contents
- TROUBLESHOOTING
- BOOKMARKS
- DCM-390/290 1
- INSTRUCTIONS 2
- IMPORTANT SAFETY 2
- ENGLISHFRANCAIS 3
- Getting Started 4
- Gently wipe the disc from the 6
- Part names and functions 7
- Front panel 7
- Remote control unit 8
- Rear panel 8
- Connections 9
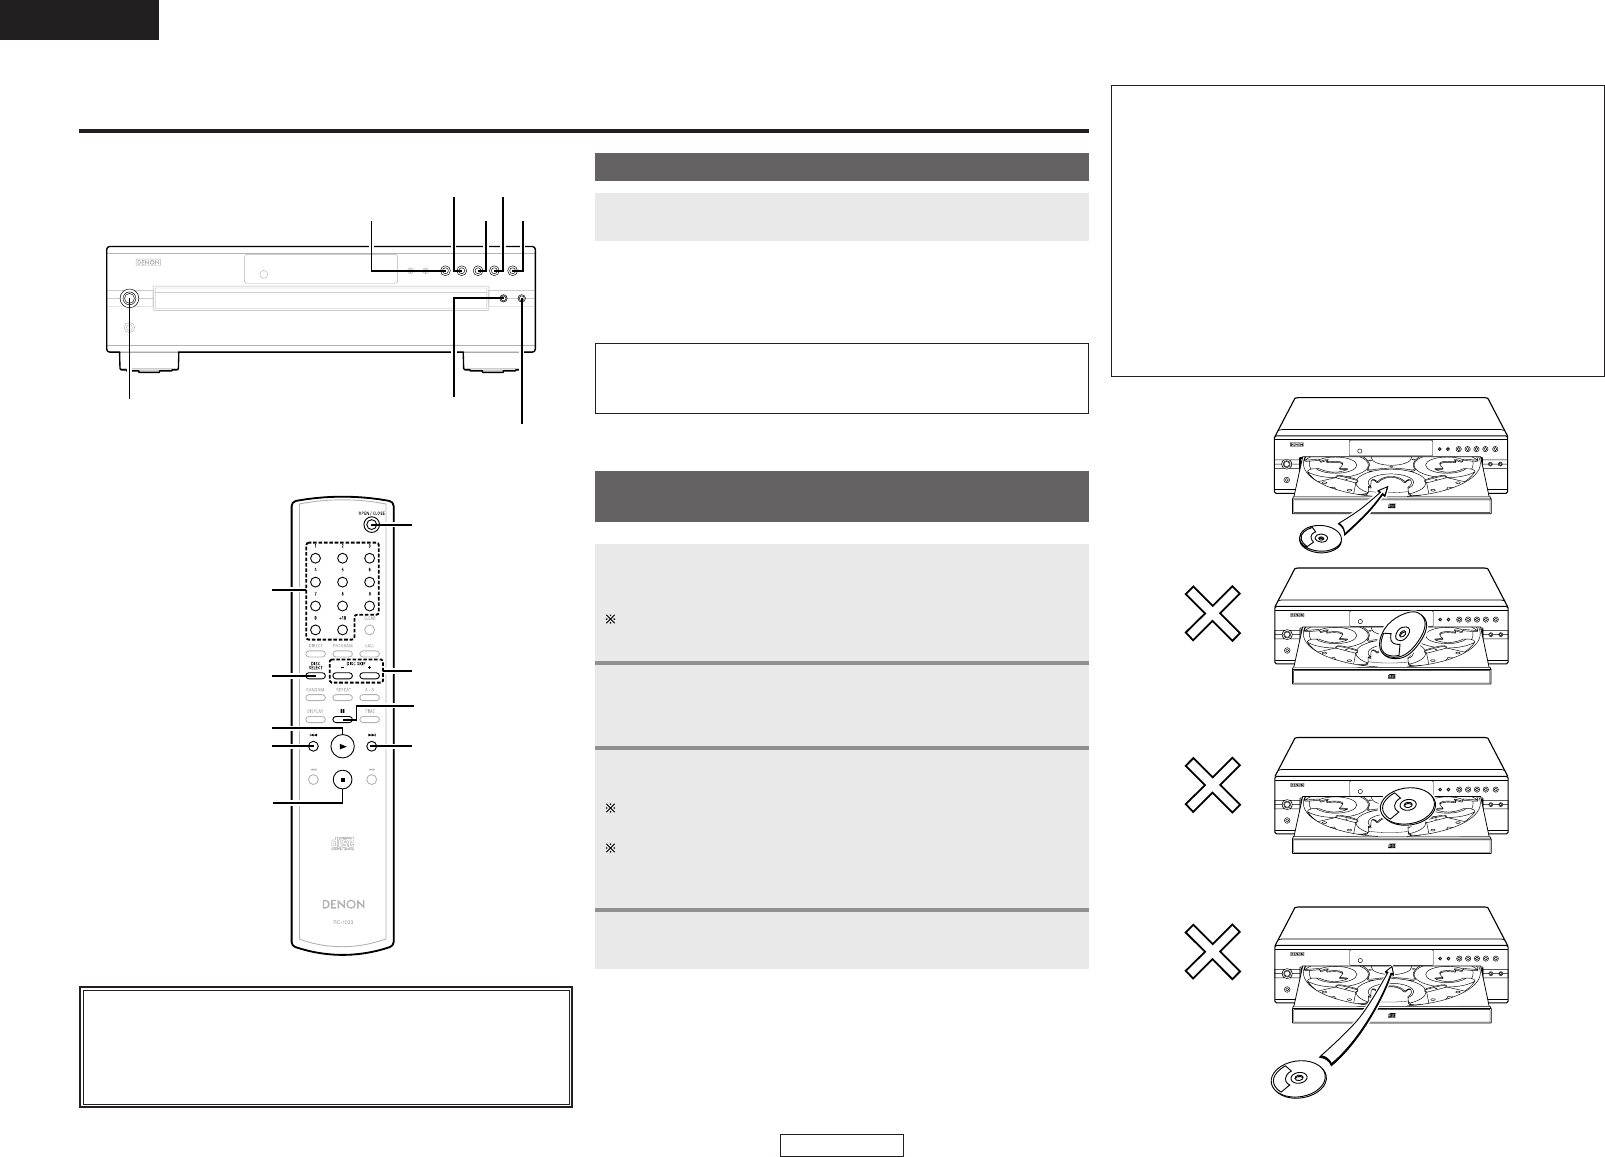
- Operation 10
- 5 to open the disc tray 12
- 6] or <8/6> to 12
- Troubleshooting 14
- ¢ Audio performance 15
- ¢ General 15
- D&M Holdings Inc 16
Related products and manuals for Car speakers Denon DCM-390/290


 (38 pages)
(58 pages)
(38 pages)
(38 pages)
(58 pages)
© 2020, manymanuals.com. All rights reserved. | 0.867 s |
 Manymanuals.com
 Manymanuals.de
 Manymanuals.fr
 Manymanuals.it
 Manymanuals.pl
 Manymanuals.cz
 Manymanuals.es
 Manymanuals-pt.com
Comments to this Manuals