ENGLISH
12
(5) Fade-in time setting
★ To perform fade-in recording, set the fade-in time.
(See Page 19.)
1
Set the unit to the setup mode, then turn the jog dial of the main unit or press the automatic search button of the
remote control to display “FadeIn Time?”.
2
Press the enter button to set the fade-in time setting mode.
3
Turn the jog dial on the main unit or use the automatic search buttons on the remote control unit to set the fade-in time.
• The setting is displayed on the multi-display section. “FadeIn **sec”
✽ The setting can be set between 1 and 15 seconds in steps of 1 second.
4
Press the enter button to set the fade-in recording time.
•“Complete” will be displayed.
(6) Fade-out time setting
★ To perform fade-out recording, set the fade-out time.
(See Page 19.)
1
Set the unit to the setup mode, then turn the jog dial of the main unit or press the automatic search button of the
remote control to display “FadeOutTime?”.
2
Press the enter button to set the fade-out time setting mode.
3
Turn the jog dial on the main unit or use the automatic search buttons on the remote control unit to set the fade-out
time.
• The setting is displayed on the multi-display section. “FadeOut**sec”
✽ The setting can be set between 1 and 15 seconds in steps of 1 second.
4
Press the enter button to set the fade-out recording time.
•“Complete” will be displayed.
OPEN / CLOSE
TIME
TIME
CLEAR INPUT
MENU
5
OPEN /CLOSE
5
PCM AUDIO TECHNOLOGY / COMPACT DISC RECORDER CDR-W1500
PHONES PHONES LEVEL
MIN
MAX
POWER
ON
OFF
FINALIZE
MULTI JOG
3
1
2
3
1
2
PLAY STOP PAUSE
HIGHNORMAL
DUBBING
8
9
RELAY MODE
DISPLAY
SELECT
TITLE /
CHARACTER
PUSH
ENTER
8
9
PLAY STOP PAUSE
4
REC
-
+
REMOTE SENSOR
STOP
PAUS E
PLAY
2
4
3
78
56
1
9
10
+
10
REC
ENTER
MENU
8
9
3
2
6
7
PROG/DIRECT
CALL
RANDOM
DISPLAY SEL
.
FADER INPUT FINALIZE
1 / ALL A - B
CHARACTER
TIME
TITLE
M M
+
CLEARCLEAR
A ! "A ! "
J J
( )
D # %D # % G & 'G & '
P P
,
−
Y Y
< >
V V
:
;
S S
.
/
[ = ][ = ] {
?
} }
*
1,2,3,4
2,4
1,3
(Main unit) (Remote control unit)
(7) Setting of the intro play time for scan recording
★ To perform scan recording, set the intro scan play time.
(See Page 15.)
1
Set the unit to the setup mode, then turn the jog dial of the main unit or press the automatic search button of the
remote control to display “Intro Time?”.
2
Press the enter button to set the intro scan play time setting mode.
3
Turn the jog dial on the main unit or use the automatic search buttons on the remote control unit to set the intro scan
play time.
• The setting is displayed on the multi-display section. “ScanTime **s”
✽ The setting can be set between 5 and 30 seconds in steps of 5 seconds.
4
Press the enter button to set the intro scan play time.
•“Complete” will be displayed.
OPEN / CLOSE
TIME
TIME
CLEAR INPUT
MENU
5
OPEN /CLOSE
5
PCM AUDIO TECHNOLOGY / COMPACT DISC RECORDER CDR-W1500
PHONES PHONES LEVEL
MIN
MAX
POWER
ON
OFF
FINALIZE
MULTI JOG
3
1
2
3
1
2
PLAY STOP PAUSE
HIGHNORMAL
DUBBING
8
9
RELAY MODE
DISPLAY
SELECT
TITLE /
CHARACTER
PUSH
ENTER
8
9
PLAY STOP PAUSE
4
REC
-
+
REMOTE SENSOR
STOP
PAUS E
PLAY
2
4
3
78
56
1
9
10
+
10
REC
ENTER
MENU
8
9
3
2
6
7
PROG/DIRECT
CALL
RANDOM
DISPLAY SEL
.
FADER INPUT FINALIZE
1 / ALL A - B
CHARACTER
TIME
TITLE
M M
+
CLEARCLEAR
A ! "A ! "
J J
( )
D # %D # % G & 'G & '
P P
,
−
Y Y
< >
V V
:
;
S S
.
/
[ = ][ = ] {
?
}
*
1,2,3,4
2,4
1,3
(Main unit) (Remote control unit)
OPEN / CLOSE
TIME
TIME
CLEAR INPUT
MENU
5
OPEN /CLOSE
5
PCM AUDIO TECHNOLOGY / COMPACT DISC RECORDER CDR-W1500
PHONES PHONES LEVEL
MIN
MAX
POWER
ON
OFF
FINALIZE
MULTI JOG
3
1
2
3
1
2
PLAY STOP PAUSE
HIGHNORMAL
DUBBING
8
9
RELAY MODE
DISPLAY
SELECT
TITLE /
CHARACTER
PUSH
ENTER
8
9
PLAY STOP PAUSE
4
REC
-
+
REMOTE SENSOR
STOP
PAUS E
PLAY
2
4
3
78
56
1
9
10
+
10
REC
ENTER
MENU
8
9
3
2
6
7
PROG/DIRECT
CALL
RANDOM
DISPLAY SEL
.
FADER INPUT FINALIZE
1 / ALL A - B
CHARACTER
TIME
TITLE
M M
+
CLEARCLEAR
A ! "A ! "
J J
( )
D # %D # % G & 'G & '
P P
,
−
Y Y
< >
V V
:
;
S S
.
/
[ = ][ = ] {
?
}
*
1,2,3,4,55
2,4,5
1,3,5
5
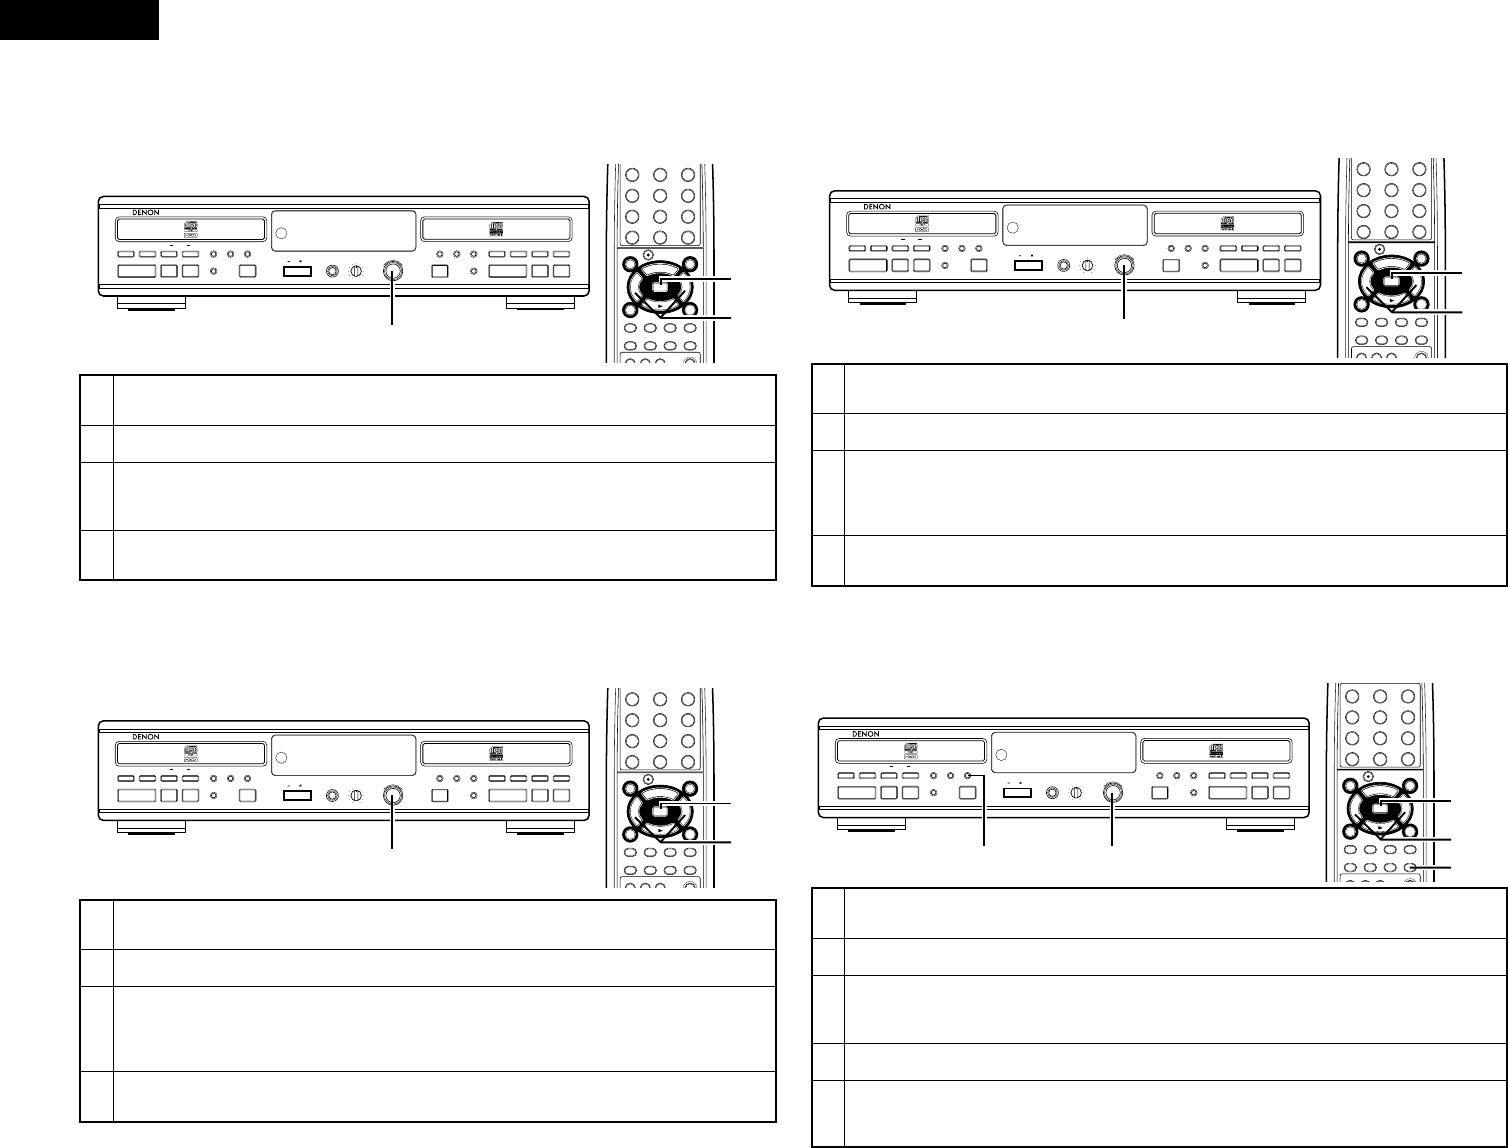
(8) Setting of the Custom Index
★ A desired name can be associated with the input jacks.
★ This is convenient for checking which equipment is connected with the input jacks.
1
Set the unit to the setup mode, then turn the jog dial of the main unit or press the automatic search button of the
remote control to display “Custom Index”.
2
Press the enter button and set the custom index entry mode.
3
Turn the jog dial of the main unit or press the automatic search button of the remote control to select the jacks for
which a name will be associated.
• The selected jacks indication will flash. “Opt/Coax/Ana”
4
Press the enter button and set the jacks for which a name will be associated. This will set the name entry mode.
5
Select the entry mode with the character button, then turn the jog dial of the main unit or press the automatic search
button of the remote control to select the characters. Enter one character at a time with the enter button.
• See “Text editings” on Page 31 for details of the character entry method, then perform operations 7 and 8.
(Main unit) (Remote control unit)
 (8 pages)
 Manymanuals.com
 Manymanuals.de
 Manymanuals.fr
 Manymanuals.it
 Manymanuals.pl
 Manymanuals.cz
 Manymanuals.es
 Manymanuals-pt.com
Comments to this Manuals