Denon DN-F450R Owner's Manual Page 15
- Page / 52
- Table of contents
- TROUBLESHOOTING
- BOOKMARKS
- DN-F450R 1
- CAUTION: 2
- IMPORTANT SAFETY INSTRUCTIONS 3
- SOBRE UTILIZAÇÃO 5
- Contents 8
- Getting started 9
- Part names and functions 10
- Rear panel 11
- Switching the display 12
- Display during stop status 12
- Connections 14
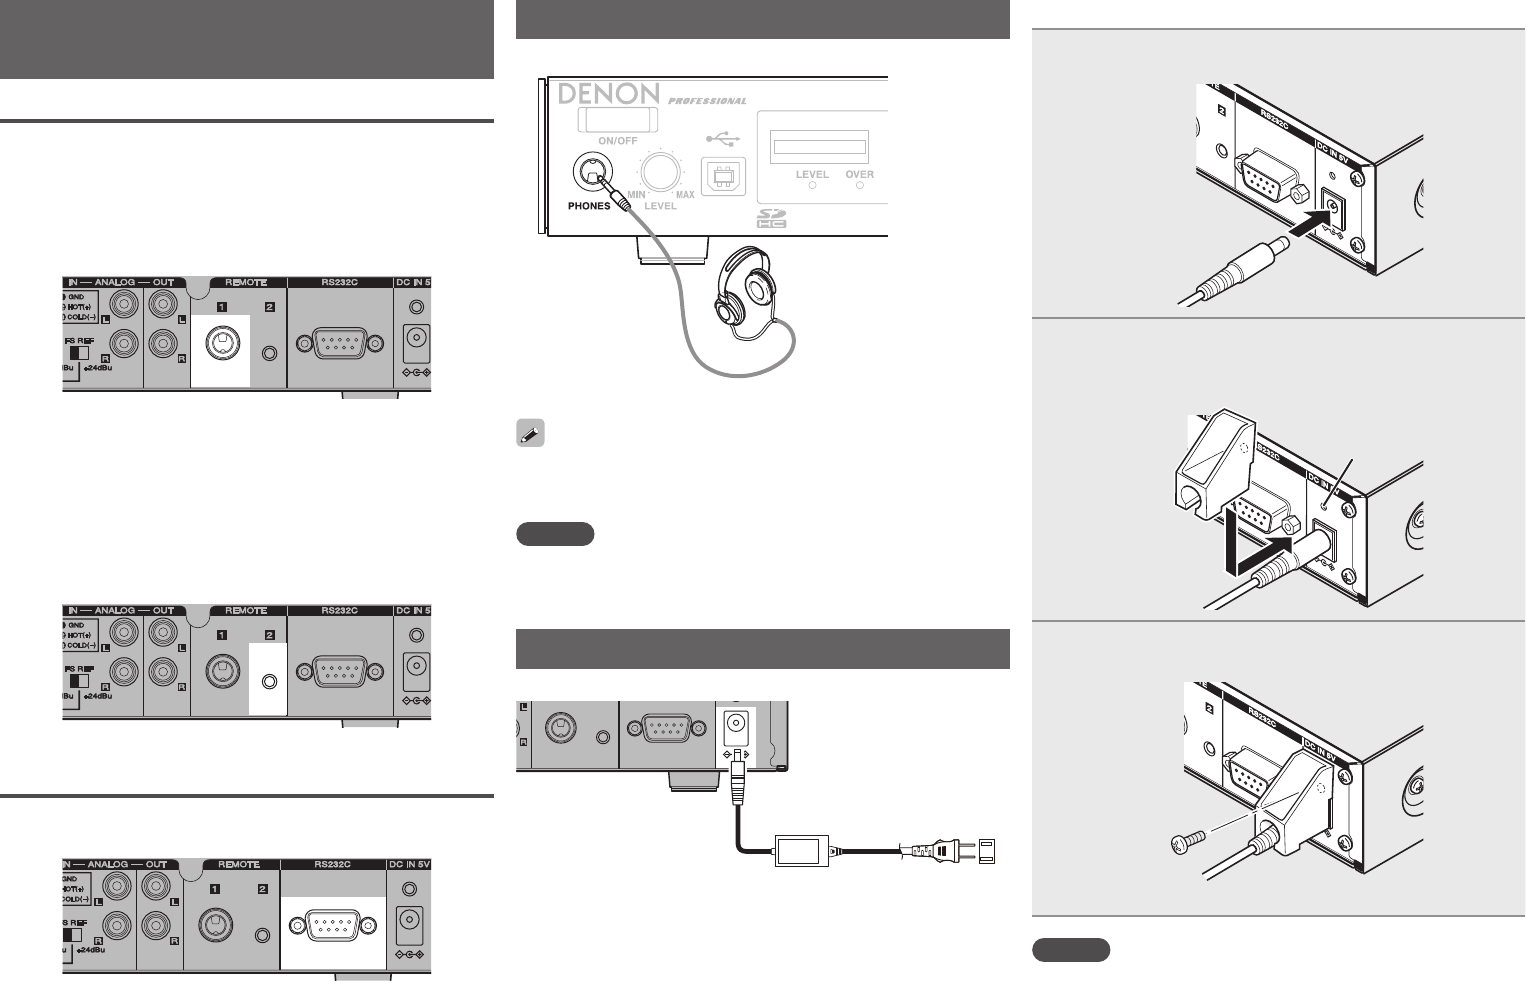
- Connecting headphone 15
- Connecting the AC adaptor 15
- Mounting SD card 16
- Setting defaults 17
- icon is shown on the 19
- n Renaming presets 20
- Display settings (Display) 21
- Utility function (Utility) 22
- Recording 23
- Operations during recording 24
- Recording time chart 25
- Playback 26
- Operations during playback 27
- Connecting to a computer 28
- File/Folder settings 29
- Folder menu 30
- Selecting folders (1 Select) 31
- Renaming folders (3 Rename) 31
- Deleting folders (4 Delete) 31
- Other functions 32
- Control function 33
- REMOTE terminal 2 34
- RS232C control 35
- DN-F450R status 36
- n Control command code table 37
- Information 47
- Troubleshooting 48
- Specifications 49
Related products and manuals for Recording Equipment Denon DN-F450R

 (54 pages)

 (98 pages)
© 2020, manymanuals.com. All rights reserved. | 0.997 s |
 Manymanuals.com
 Manymanuals.de
 Manymanuals.fr
 Manymanuals.it
 Manymanuals.pl
 Manymanuals.cz
 Manymanuals.es
 Manymanuals-pt.com
Comments to this Manuals